So you want to learn how to make candles. Maybe you’re drawn to the creativity, the chance to fill your home with lovely scents, or even the idea of starting your own candle business. It’s an exciting world, full of options for fragrance, color, and style. But where do you begin? How do you go from a pile of wax and wicks to a beautifully scented candle ready to light up your evening? Don’t worry, I’m here to guide you through everything you need to know to get started with making candles. By the end of this post, you’ll be confident in crafting your own candles.
This blog post is all about how to make candles.

Home > Ecommerce Tips > How To Make Candles
DISCLOSURE: This is not a sponsored post. Through my links, I may receive a commission if you decide to make purchases at no cost for yourself! Check out our disclaimer for more info on how it works.
Table of contents
- Getting Started with How to Make Candles
- Types of Candles You Can Make
- Step-By-Step Guide on How to Make Candles
- Tips for Success in How to Make Candles
- Relaxing Lavender and Eucalyptus Candle
- Why is it Important to Use Candle-Safe Fragrance?
- Final Thoughts On How To Make Candles
- Additional helpful blogs tools, legal tips, and resources
Getting Started with How to Make Candles
The first step to any successful candle-making session is gathering your supplies. Thankfully, candle making doesn’t need a lot of complicated equipment. You probably already have a lot of these things around your home.

Candle Making Supplies
- Wax: This is the foundation of your candle. Popular options include soy wax (natural, clean-burning), beeswax (natural with a honey scent), paraffin wax (economical, great for fragrance), and blends.
- Wicks: Choose a wick size appropriate for your container. For example, a thicker wick will melt wax faster and works better in a larger candle. Consider cotton wicks for clean burning.
- Containers: Empty glass containers, tins, or even teacups can be used for candles. Clean them thoroughly before starting.
- Fragrance Oils or Essential Oils: Add scents to your candle. Experiment to find your favorites. Sites like Essential Oils have great resources and fragrance oil options. Many also have resources on the safety and uses of essential oils, making it an excellent resource to research essential oils uses.
- Double Boiler or Heat-Safe Pot: For melting the wax. If you’re feeling really ambitious you could use a candle melting pitcher, these make melting wax simple. You can improvise a double boiler by putting a heat-safe bowl on top of a pot with simmering water.
- Thermometer: To monitor wax temperature.
- Spatula or Stirring Spoon: For mixing wax and fragrance.
- Wick Stickers or Glue Gun: To secure wicks in your containers.
- Pencils or Popsicle Sticks: To help center your wicks.
- Optional Supplies: Dye for coloring the candles, a scale for measuring wax if you’re doing more complex projects, a heat gun to help remove air bubbles, a wick trimmer.
Types of Candles You Can Make
You’d be surprised at how many types of candles you can make at home. With just a few basic adjustments and your imagination, you can customize your candles. Here are some popular types to get those creative ideas flowing:
Soy Candles:
Made from soy wax, these candles are eco-friendly and popular. They’re known for having a long and clean burn. Take, for instance, the captivating New York City soy candle, a perfect example of this variety.
Scented and Aromatherapy Candles:
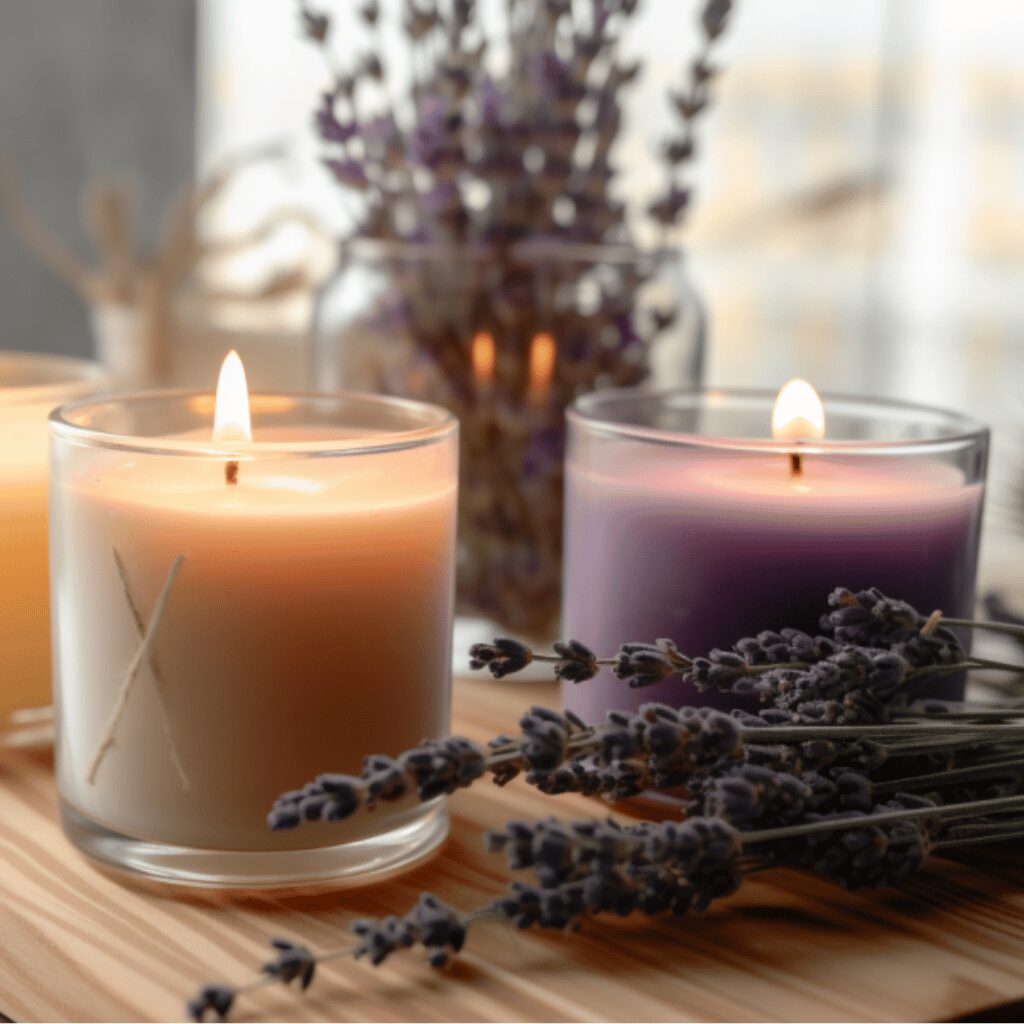
These candles offer a world of fragrance options, perfect for setting a mood or masking unwanted smells. Check out the enticing KUSH scented candle, which showcases this candle’s alluring appeal. Aromatherapy candles use essential oils blended for specific benefits. Think lavender for relaxation or eucalyptus for its invigorating effect. You’ll love creating your own personal aromatherapy mixes to help calm your senses at the end of the day.
Vegan Candles:
Made with plant-based waxes like soy, these cater to shoppers seeking ethical and cruelty-free options. A wonderful illustration of this trend is the elegant vegan candle by Brooklyn Candle Studio.
Decorative Candles:
Sometimes you just want a candle that looks beautiful. You might try using unique shapes, interesting colors, or embedding decorative items like dried flowers. Consider this sleek decorative candle from Amara as an inspiring example.
Step-By-Step Guide on How to Make Candles
Now let’s dive into how to make candles with a step-by-step guide for making your first candle at home:
1. Prepare Your Work Area
Cover your workspace with newspaper or a drop cloth to catch any drips. This will also save your furniture. This makes cleanup easier, too. Candle-making can get messy, so you don’t want to be cleaning wax off your nice countertops.
2. Prep Your Container
If you’re making a container candle (as opposed to a mold candle), choose a jar or other heat-safe container. It’s always best to stick with glass, ceramic, or metal to avoid any mishaps with melting. Give it a good wash with soap and water and let it dry completely. Even a drop of water left in the container could cause splatter when you pour in the hot wax. So take the time for a nice thorough drying.
3. Measure and Melt the Wax
You can measure your candle wax in several ways. One is to use your container to measure it out—for example, fill the container you’re using twice with wax flakes, since melted wax takes up less volume. If you prefer a precise approach or are making larger batches, you might like to use a scale. Whichever method you choose, double-check to make sure you have enough wax before getting started.
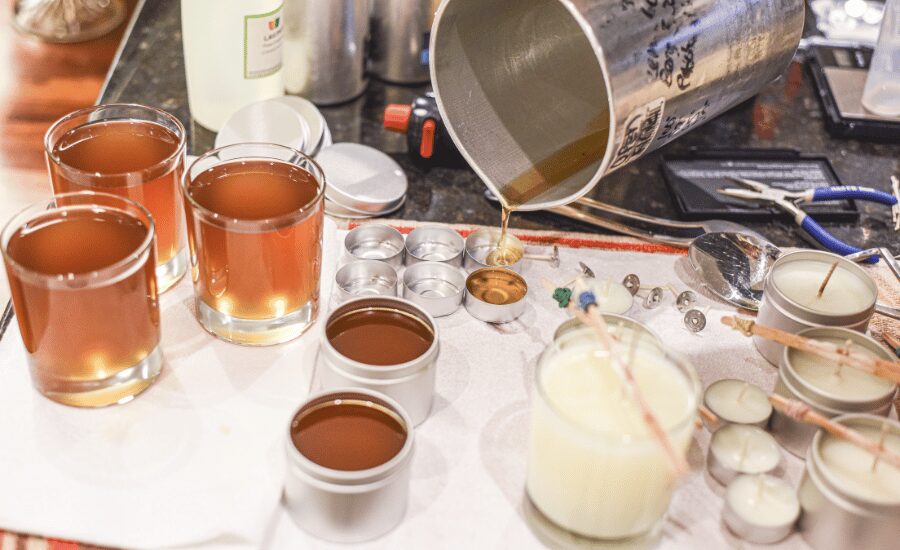
Put your measured wax into your double boiler or heat-safe pot over medium heat. Now for the fun part. Let your wax slowly melt. You’ll want to make sure to stir it with your spatula to avoid it sticking and burning on the bottom. A heat gun can be a game-changer during this stage. If you notice air bubbles, simply give those pesky bubbles a quick blast with your heat gun. Your smooth candle surface will thank you.
Use a thermometer to monitor the wax temperature and watch for it to reach around 180-185°F. If it gets too hot, turn down the heat a little bit. We’re shooting for nice, even melting and blending.
4. Secure the Wick
While your wax is busy melting, grab your wick. Trim it to the right size—a good rule is about an inch longer than the container’s height. If you have a wick sticker, use it to secure the wick to the bottom of your container. Alternatively, put a dab of hot glue at the bottom of the wick tab (the metal disc at the bottom of the wick) and stick it firmly at the bottom center of the container. Let the hot glue dry completely, holding it if needed, so you know your wick is stuck in the right place.
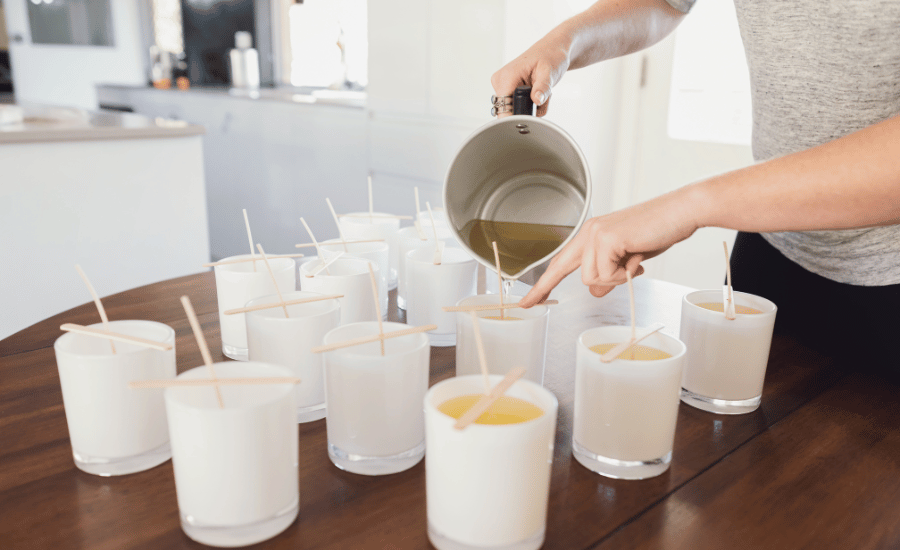
To prevent the wick from leaning while you’re pouring the wax, center the wick over the top opening and secure it. Try holding the wick in place using pencils or Popsicle sticks lying across the top of the container. Easy peasy.

5. Add Fragrance and/or Dye (Optional)
For a plain, unscented candle, you can skip this step. However, it’s really fun to get creative and play around with adding your own fragrances to your candle.
For fragrance oils, you typically use a percentage of the total weight of your wax—around 6-10% is common. It’s always good to double-check those directions to make sure you’re adding the right amount.
Essential oils are measured in drops—I like starting with around 30-40 drops per eight ounces of wax. Experiment to find the fragrance strength you prefer. But, with both types of fragrance, err on the side of adding less. You can always add a touch more if the scent isn’t strong enough, but once you put too much fragrance in, you can’t take it back.
If you are adding fragrance oil to the wax, stir the melted wax mixture for at least 2 minutes to get a good blend.
If you’d like to add a bit of color, add candle-safe dye blocks or liquid dye, following the instructions on the dye you choose. Don’t use regular craft dyes; these won’t blend properly with the wax and may clog your wick. Also, make sure that your dyes are skin safe if you plan on making a candle business in the future. Make sure to mix well for even color distribution throughout the candle.
6. Cool and Pour the Wax
Let your wax mixture cool down a little bit. Aim for about 130-140°F. Now comes the most satisfying part – pouring the wax. Remember all that hard work to center and secure the wick earlier? Now it pays off because that centered wick means you get a beautiful, even burn from your candle. You want to try pouring slowly to reduce air bubbles forming in your candle. Once poured, you might still see some small bubbles surface – if this happens, you can gently tap the sides of the container or use your trusty heat gun to eliminate those little air bubbles.
7. Wait for the Candle to Cure
This step requires patience, I know. But it’s worth it. Curing is when the wax hardens and the fragrance binds fully, leading to a better, stronger-smelling candle. Set your candle aside in a cool, draft-free spot to allow it to cool. Resist the urge to move or touch the candle during this stage, because a smooth, undisturbed cure makes the best-looking candle.
The cure time depends on the wax and size. Soy wax, for example, takes about three to four days for a full cure. Paraffin wax is usually ready in a couple of days. Beeswax candles need a bit more patience, taking up to 10 days to cure completely. Patience is key, friends. You will get the best-burning candle by giving your candles plenty of cure time.
8. Trim the Wick
Once cured, your candle is almost ready. You might have noticed the wick sticking out a bit longer than the ideal length. This can lead to smoking, so give it a quick trim. Just about a quarter of an inch should do it.
9. Light and Enjoy Your Candle
This is the most exciting part of the whole process. Grab your candle lighter, dim the lights, and settle in. Breathe in the delicious fragrance and revel in the satisfaction of your very own hand-made creation. Congratulations, you’ve just successfully navigated the exciting world of candle making.
Tips for Success in How to Make Candles
I know you’re already excited about getting started with your candle-making adventure, but I want to give you some more useful tips I’ve picked up from my own candle-making journey. Remember those pesky air bubbles we discussed? Well, there’s a trick to minimizing their formation during pouring. If you pre-warm your jars or containers, it can make all the difference. You could do this in the oven on a low setting or even with a heat gun—but always err on the side of caution. I always suggest starting with a lower temperature and going from there.
Sometimes, you end up with a little sinkhole around the wick after pouring, but don’t worry, it happens to even experienced candle-makers. It’s totally fixable with a “top-off” pour—simply remelt a little bit of wax and pour it over the sinkhole for a smooth, professional finish. The sinkhole tends to be more common with natural waxes like soy and beeswax.
You might find yourself becoming increasingly obsessed with candles and begin searching for “essential oils.” But, be aware of their dangers as some essential oils can be dangerous when taken incorrectly, so do your homework before using them in aromatherapy. Research on sites like essential oils for specific usage advice.
Also, as the National Candle Association reported, consider selling candles, as it has a very high return for small businesses. You’re in good company because a candle company is a scalable venture proven to work time and again.
Candle making is all about experimenting. It’s easy to personalize candles with scent, style, and color. The possibilities for creativity with making candles are endless.
Relaxing Lavender and Eucalyptus Candle
Here is one of my favorite candle recipes:
I love to start my day with the refreshing scent of eucalyptus and end it with the soothing aroma of lavender. I created a recipe for a dual-layered candle, perfect for either morning or night:
Ingredients
- Approximately 9 cups of unmelted soy wax flakes, divided
- Wicks
- Wick Holders
- 6 (8-ounce) amber jars with lids (or a similar size)
- 60 drops lavender essential oil
- 60 drops eucalyptus essential oil
- Essential oils come in different blends, so try a blend that is meant for the desired mood you are seeking. Or, blend them to match the season, such as Autumn.
- Extra Large Glass Measuring Cup
- Scale (optional)
- Kitchen Thermometer
Steps
- Prepare your containers. Ensure they are clean, dry, and ready for the hot wax.
- Attach your wicks to the bottom of your containers, centering them as described in the step-by-step guide. Use wick holders or improvise with pencils to hold the wicks upright and straight.
- Measure and divide your wax. This recipe calls for about 4.5 cups per layer, per jar.
- Melt one portion of your wax in a double boiler, monitoring the temperature closely until it reaches about 185°F. Add the eucalyptus essential oil to the melted wax. Remember those tips for removing air bubbles.
- Carefully pour this first layer into each jar, filling it to about halfway. Make sure to pour slow and steady. Set aside and allow it to harden. Be sure to place the jar on a sturdy, level surface where they can stay undisturbed while they harden.
- Meanwhile, in another clean pot (or after the first pot has cooled completely), melt your remaining wax in the same way you did before, heating to about 185°F. Stir in the lavender essential oil to this portion of melted wax, mixing thoroughly.
- Once the eucalyptus layer is firm and fully set, gently pour the lavender layer on top, again paying attention to your pouring speed to avoid any air bubbles. Use your heat gun to banish any remaining air bubbles. Now, your candles can cure for 3-4 days until completely hardened.
- Once the candle has cured completely, carefully trim your wicks to the right height, approximately ¼ inch long. Congratulations, your beautifully scented, layered candle is ready to light and enjoy.
This basic layered recipe can be customized to any of your favorite scents and with different wax types. Try swapping the soy wax with beeswax or a paraffin/natural blend. If you aren’t a fan of these specific scents, you can substitute different oils, fragrance oils, or any essential oil you would like. There are infinite possibilities once you learn how to make candles.
Why is it Important to Use Candle-Safe Fragrance?
You’re excited about the creativity of choosing different essential oils or fragrance oils—after all, you get to select those luscious scents. While essential oils are natural and plant-derived, they are not automatically a safe bet. The strength and properties of each type can vary. Using an essential oil diffuser might work well for essential oils, but some types are best suited for use with essential oils in a carrier oil, such as almond oil or coconut oil.
Certain oils may be too harsh or even potentially flammable when burned. When experimenting with your own blends for aromatherapy, it’s best to learn which essential oils work best for a particular purpose.
Always remember: if you are making candles, research and confirm that your chosen fragrance oil is safe to be burned.
Final Thoughts On How To Make Candles
Now that you’ve gotten a taste of how to make candles, I’m excited for you to experiment and create your own little candle studio right at home. As you explore all the varieties of fragrances and wax types and discover which containers speak to your aesthetic, don’t forget to have fun. Remember to give yourself plenty of grace for those little imperfections—even a slightly off-centered wick won’t affect how your candle burns, especially if you know how to make candles with care. Each time you light your handmade candle, think back to the time and effort you invested. Now, take a moment to relax, breathe in the gorgeous scent you’ve created, and pat yourself on the back for bringing a bit of light and warmth into the world.
Additional helpful blogs tools, legal tips, and resources
Affordable Trademark registration package to protect your business – Learn more!
Get started now & see why it's the best all-in-one marketing platform. Try it for 30 days!
Use this AI plagiarism checker to ensure your content is free from copyright issues and originality concerns – Learn more!
Elevate your brand with these beautiful website and social media templates! See them here!
Beat your competition and create better content with these easy-to-use tools and strategies. Learn more!
If your business or brand has a website, you need these agreements (no seriously, it’s not an option) Learn more!
Unlock the Power of Automation with ManyChat: Transform Your Workflow Today! Learn more!
Explore Our Premade Content Collections: Discover a Range of Videos and Stock Images to Make Content Creation Effortless and Inspiring! Learn more!
Use this SEO Tool to make sure your blog rank on the first page of Google + blow up your traffic! Learn more!
Launch your Email List with ConvertKit, the Ultimate Email Provider loaded with all the bells and whistles! Start Your Free Trial!
My number one tool to explode your blog traffic! Check it out here!
CapCut is an all-in-one creative platform powered by AI that enables video editing and image design on browsers, Windows, Mac, Android, and iOS. Learn more!
Unlock the Secrets to Building a Thriving Online Business! Subscribe to my YouTube channel for access to over 1,000 free videos packed with expert insights and actionable strategies to help you start, manage, and elevate your business. Subscribe here!
A great all-in-one business platform for hosting your course, sales page, checkout page, and much more. Learn more!
The best web hosting company for your website. Learn more!
More tools to grow your online business:
TubeBuddy to grow your YouTube channel, and this is another great tool for YouTube SEO! Learn more!
Learn how I make passive income $3,000 per month by reviewing products I own and love. Learn more!
Whether you’re a seasoned marketer or just starting out, our social marketing membership offers everything you need to stay ahead of the curve and make an impact. Ready to take your social media presence to the next level? Join us today!
All the essentials to kickstart your digital marketing business from scratch! 23 guides for $23 dollars! Check out the Ultimate Digital Vault Marketing here!
The 4-Step Framework for A Profitable Etsy Shop! Reserve Your FREE Seat here!
65 Ready-to-use email templates to boost your business - check them out!
4,806 + pieces of social media to help you save time, grow your brand awareness, and make money online! See the list!
Start, grow, and scale your Etsy business to a full-time income with our signature course! Check it out here!


+ show Comments
- Hide Comments
add a comment